Showing posts with label crafty. Show all posts

2.08.2013

Shared Girls Room

So like I said in my previous post, I have been a busy bee painting Ellie Kate and Abigail's furniture that was given to us by Jeff's grandmother and mom.  It's a pretty classic French Provincial style set that was very popular in the 50s.  The before wasn't necessarily bad, it just blended with the walls and didn't really go with the other stuff I already had in their room.  So, I decided to give the set a makeover.  I love how everything turned out! However, I may not be painting anything again in the near future.  I got my painting fix for awhile:).  Ha ha! 

  The only thing new is the furniture. Everything else was already in there.  We just rearranged a bit since before this we had bunk beds.  This is not a decorating show piece by any means.  Just a fun little girls room that my 4 and 5 year old truly enjoy and play in (because we don't have a playroom). 


I did spray paint the hardware with some oil rubbed bronze spray paint I already had on hand. 
I used oil based paint for these pieces which was sort of a pain, but will hopefully hold up well over time!  It's White Dove by Benjamin Moore.


I decided to give the beds a little pop of color with some pink!  Don't know that color off the top of my head but if you want to know, just leave me a comment and I'll add it back in the post:).


I got this bedding a year or so ago for the girls with some of their Christmas money from Pottery Barn Kids.  I still love it! 


This is their little play corner of American Girl and Bitty Baby Twin dolls.  They also have a walk in closet with a good many books and toys in it in addition to their clothes.


Just a small gallery wall...


Oh the tree is a fabric vinyl that is removable.  I got it on Etsy a few years ago and I love it because it can be moved.  I kept the tube and plastic it came on so I could move it with us wherever we go or if I decide to move it around the room. 


This sweet girl wanted to get in some pics.  Of course I obliged:)...


Abigail loves her pretty new bed!
(so does Ellie Kate, but she was at school when I took pics)


And here is what the set looked like before...


 This is the original brochure that came with the furniture.  What a blessing to have this set in our family!  We are so thankful!


11.28.2012

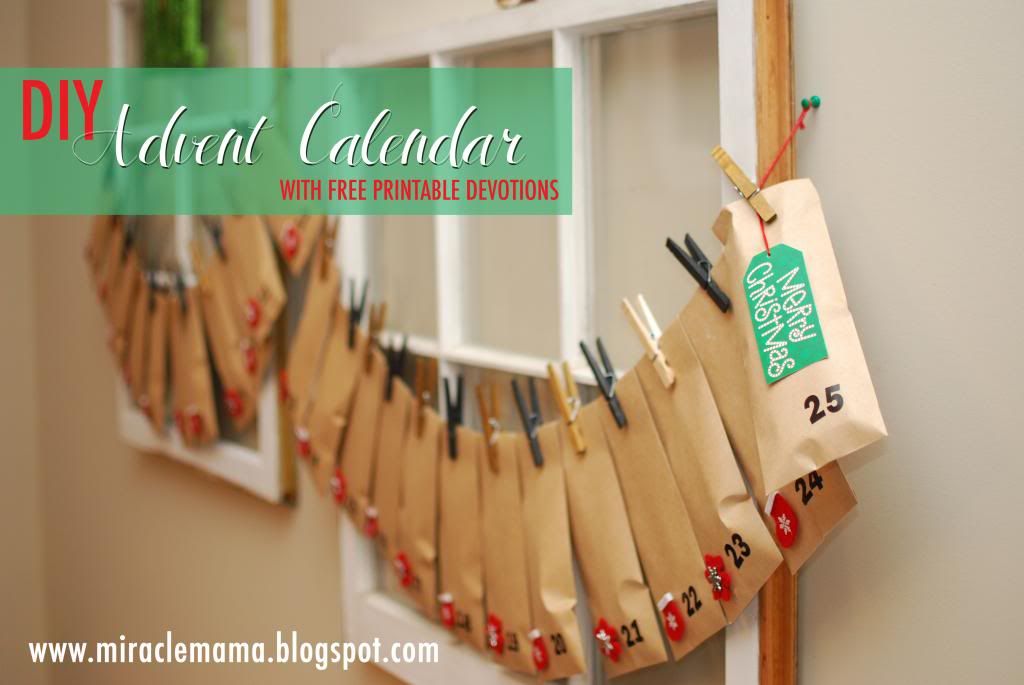
DIY Advent Calendar with Easy Devotions

I'm so excited about Christmas and the holidays!  We are slowly decking the halls and getting our decorations up.  Hopefully, we can get our tree this weekend!

So, for the last few years I have struggled to find an advent calendar that works for our family.  Are we the only ones out there whose children can't sit still and cooperate for more than 2-3 minutes?  I mean, in the past we have tried to do some of the longer devotionals out there and in the end Jeff and I just got frustrated and mad because our kids are apparently all ADD and hyperactive and can't listen:).  Seriously, it's like we bring out the Bible or something serious and our kids go wild.  Pull out Cat in the Hat and they will listen like angels.

This year, I was determined to get ahead of the game and make my own advent calendar that would work for our chaotic family!  This means it needed to be fun, short, and easy!  I just finished it up yesterday so we can start it this weekend on December 1!


Photobucket

I got all my supplies at Hobby Lobby for half off or with their coupon.  This is totally customizable.  You can get whatever type envelopes you want.  I got these that were a little longer because I wasn't sure what candy I was going to get to put inside.


Photobucket

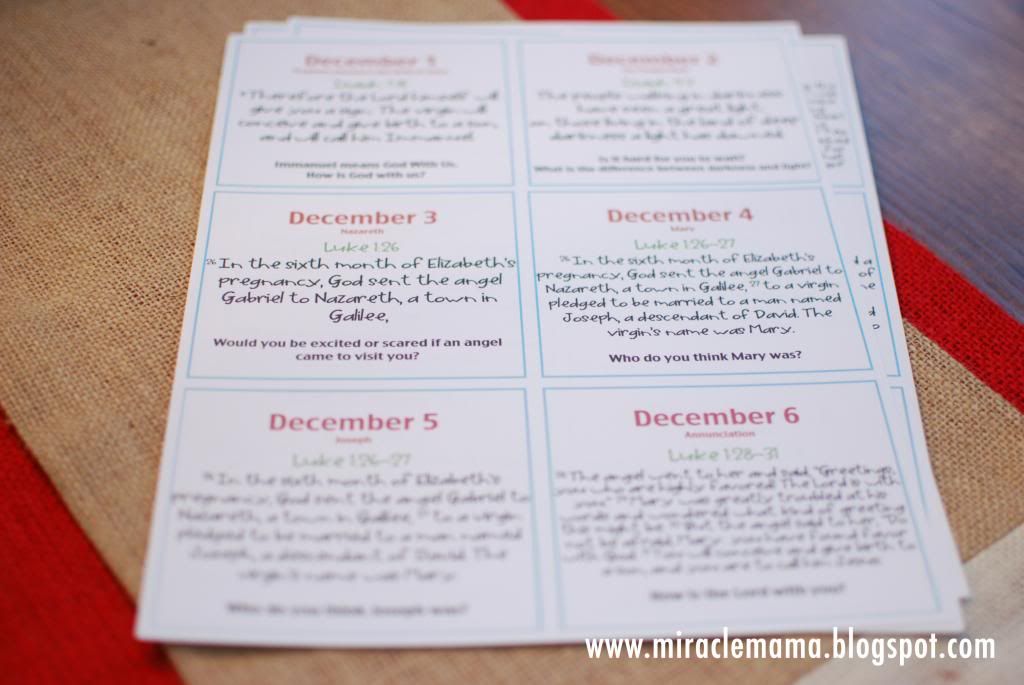
I made these easy devotionals the week of Thanksgiving.  It basically just has 1-2 verses each day to read and then a question or two to start a conversation with your kids and explore more about the events and people leading up to the birth of Christ.  I did find the order of verses online somewhere but I forgot to bookmark it so I can't give it credit.  So I used those verses and topics and then made these little cards on my computer with my added questions.  Then I printed them out on white cardstock and cut them into squares to fit into my envelopes.  We plan to do these at or around dinner time so we can read the devotion and then have the treat after dinner.

Photobucket

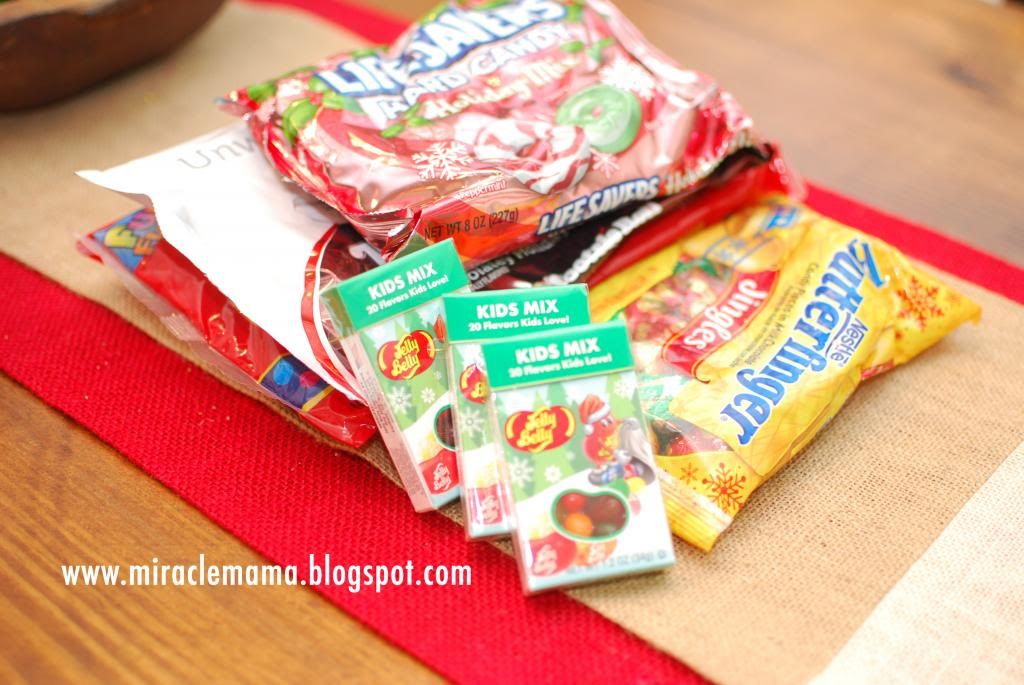
I got some smaller candy to put inside each envelope along with the devotion card,  and then the jelly beans are for the Christmas day envelope.

Photobucket


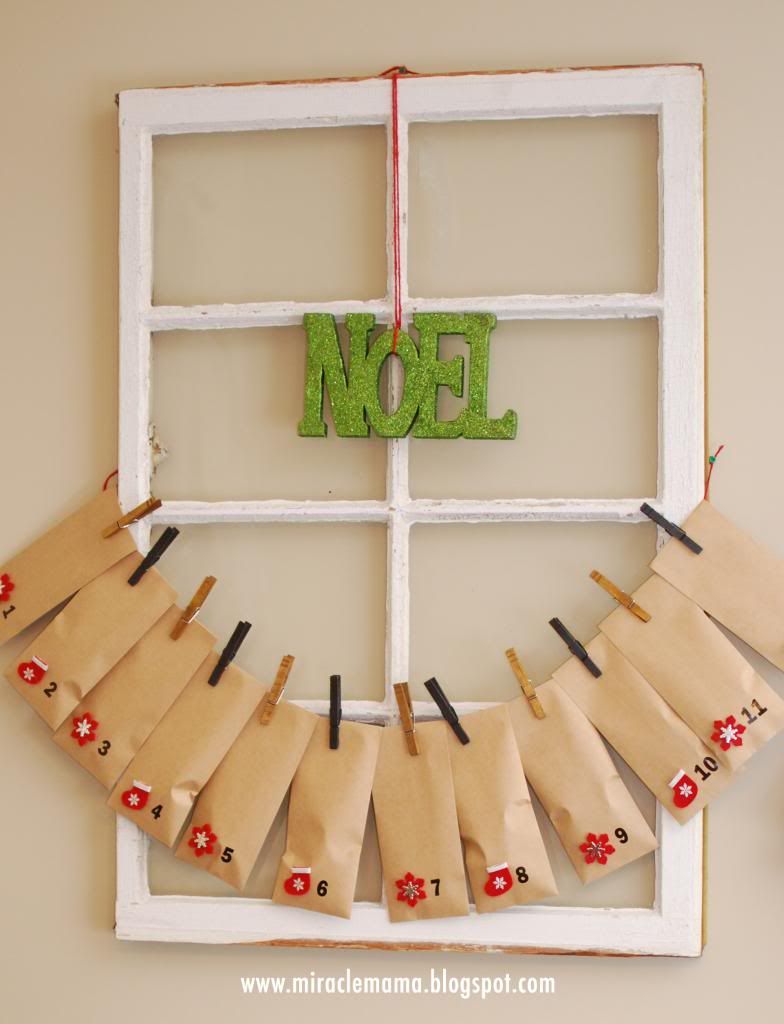
Finished product!!!

Photobucket

I struggled with how and where to hang them.  You could string them on a long wall or window or maybe even along a mantle.  In the end, I decided on my old windows and they barely fit.  But I do love how it turned out and am excited to see if my short and easy devotionals can keep my children engaged and help them focus on the true reason for this special holiday season.


And just for fun...here are my crazy rascals...

Photobucket

 And here are your free downloads for the devotions.  Just click on picture, right click and save to computer.  Then print and enjoy:). 


8.30.2012

Chalk Paint & Upholstery Project


I've had these beautiful chairs for nearly a year now.  I got them on our local facebook garage sale sight (although they happened to be listed by a friend of mine) for super cheap!  The silk upholstery was very nice but in need of being redone because of lots of stains.  The woodwork also had a lot of nicks and scratches.  Well, I basically just lived with them this way until I mustered up the motivation to tackle the project myself.  When I bought them I originally thought I would hire someone to do the upholstery and even bought the fabric (from fabric.com with a coupon) and called the "cheap" guy in town.  But then I kept saving them for when I was coming out of the newborn funk because I knew once I had a little more time and energy, that I could probably do them myself and save myself some money:).

So I got the itch once school started back for the big kids and once chalk paint finally came to Tuscaloosa!!!  I was so excited to see a local store begin carrying Annie Sloan chalk paint.  It was the final motivation.  I went on over and bought Old White along with some clear wax.  I came home and read lots of tutorials on how to reupholster chairs like this.  I had a sweet friend send some pictures of a project she had recently done with some tips.  Then I got started.

I'll spare all the details but I will summarize by saying that I LOVE chalk paint and loved painting/distressing/waxing the wood on these chairs.  I did not love the upholstery part.  It was very tedious and I messed up several times around the arms which was frustrating.  In the end, I am very very proud of myself and I just love the finished product.  I do have plans to make matching/coordinating pillows for these chairs but for now I just added these coral ones I already had.  It took me the course of about 5 days to finish these because I had to do them in chunks of time during naps or after kiddos were in bed.

So, here they are now all bright and clean and finished...


So here is the super fun before and after...


We are still getting settled into the new house.  Maybe one day I will show you pictures of it:). 

Linking up with


8.15.2012

Back To School...

We are less than a week away from school starting back here.  This year, we have a later start date than we have in the past and I guess that's good.  Although, I will say that I am more than ready for a "normal" routine to resume even though I do hate homework and carpool:).

Our backpacks are picked out and ready.  Supplies are bought and packaged and ready to be taken up to the school tomorrow for meet and greet.  One reason we moved was to switch schools and we are a little nervous but also excited about this new chapter.  Samuel will be in 3rd grade and Ellie Kate is starting Kindergarten.  I'm a little emotional about it.  I just can't believe I have two school aged children.

Well, I saw an idea on a blog and of course I wanted to try it myself.  I love to do little happies for our teachers because they really do so much for the children.  So I got them a little gift for the kids to give out tomorrow.


Supplies: 
small glass jar (from Hobby Lobby and they were $1.99)
paper clips or something else fun teachers use (bag was $3.99 from office depot)
vinyl letter (from HL for $1.99)
ribbon to tie around just to make it cuter (so I guess this is optional) ($1.99 from HL)
gift tag (you can download mine at the end of the post)

So total cost was around $10 but at any given time a lot of the things purchased from HL are half off so it could potentially be a good bit cheaper if you plan in advance and buy the supplies when they are on sale. 


And since some of you may want to try this sometime, I am allowing you guys to copy and save the image I used for the tag on top of the jar.  Enjoy and let those teachers in your life know they are appreciated!!! 


7.20.2012

Farmhouse Table

For months now I've been ooohing and aahhing over farmhouse tables. I absolutely love them. When we sold our house and bought our new one, I was so excited because I saw that I would most likely be able to finally get a farmhouse table. Our new house has a very open concept downstairs where the family room, kitchen, and dining area are all pretty much one open room. I love that! Our old house was very choppy and separate. So, I sold my kitchen table and my formal dining room set on the local Facebook garage sale site that I've told y'all about. That gave me more than enough money to hire a "friend" who I had met on that same site to build me a table. I saw where he had started a little business building things and I got in on the beginnings of that for him to build me a table at an unreal price! He did an amazing job and hand picked the wood to use. I told him I wanted it left unstained or painted because I wanted to do that part:).  I wasn't sure exactly what I wanted it to look like.  I of course scoured Pinterest and blogs for ideas and tutorials.  I've never stained anything in my life!

Well, let me tell you...I am slightly obsessed with the final product!!! I just keep staring at it and am so in love with how it makes my dining area complete:).   I'll let the pictures speak for themselves and then I'll explain the process at the end of the post for anyone that wants to know.  The table actually has extensions for each end that extend the table length by 16 inches.  I should have taken a pic with those in because it looks awesome that way too!  Anyway, this is a great option for us since our family already has 6 people in it and with the extensions we can add some chairs for guests:).


I already had these chairs with my last oak kitchen table.  These are courtesy of my aunt who is so sweet and GAVE me these a few years ago to use!   The fabric on them was very dirty from my crazy kids, so I recovered them with drop cloth cavas from Lowes which is so cheap and looks great!


So here is what I did...
1.  put on a coat of minwax wood conditioner with a brush.  let sit for a few minutes and then wipe off any that didn't soak into the wood.  this gets the wood ready for staining.
2.  sand table lightly with 220 grit sand paper.  wipe clean
3.  stain table.  i did 2 coats of minwax early american stain with a high quality brush.  the first coat i let sit on for about 7 minutes and then wiped it off.  the second coat i let sit on for about 15 minutes and then wiped down.
4.  let table dry for 24 hours.
5.  i did a minwax polycrilic top coat in satin finish with another high quality brush (this really makes a difference).  i did 3 coats of this waiting about 2-3 hours between each coat.  it really made the table look even better than i could have imagined!
6.  for the legs, I did an antique white color.  i think it took 2 coats.  once this dried, i brushed over it lightly with the same early american stain and then quickly wiped it off (unevenly so I  left more on in the corners and edges) to give this part of the table a more worn look.  i didn't want it to be bright white.


linking up with...


TDC Before and After

3.12.2012

A Little Project

I don't get out of the house much these days (you know because of the newborn who sleeps and eats all the time) so I've gotten a bug to paint and rearrange and redecorate things. Jeff loves this, let me assure you:). Ha!  I have several things in my garage waiting for me to attack them.  Pinterest has fueled most of this I'm sure:). 


Anyway, I've had this sad little end table forever that I got at salvation army for nothing. I finally got to painting it Saturday.


I decided to use a sample paint can that I had gotten to try for the nursery.  The paint is Benjamin Moore Silver Mist (kind of a gray/blue color).   It's really beautiful on walls so I knew it would be great for this piece.  I lightly sanded first but since I'm pretty impatient I don't ever take much time on this step, then I painted most of the dresser with a small paint roller (had to use a small brush on the little detailed part at the top),  replaced the hardware with some I already had,  distresed a bit with some sandpaper, and then used rub on poly to make sure it would be protected.   This was an easy, fun little Saturday project especially since it was such a beautiful day so the kids were occupied outside:).


I replaced an older little side table with this new one in our family room.  LOVE it! 


sharing on Metamorphis Monday at...


and


and